
![]()
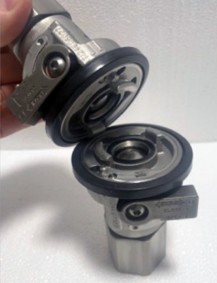
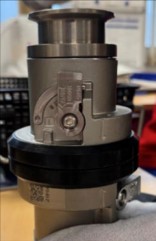
Instructions for connecting a pair of FD83 Couplings.
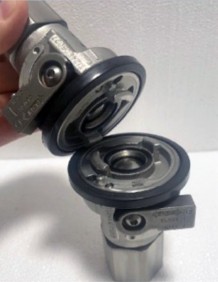
Align the lugs with the grooves on the mating coupling.
Push the parts together so the pins are compressed.
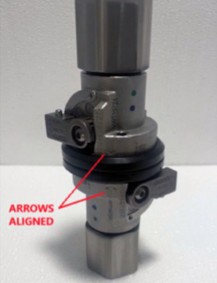
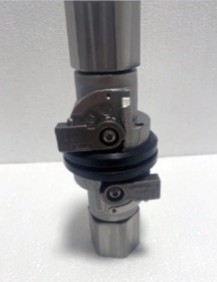
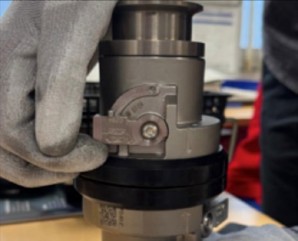
While continuing to push the parts together, twist the two couplings until the arrows align. The parts will “click” when fully engaged.
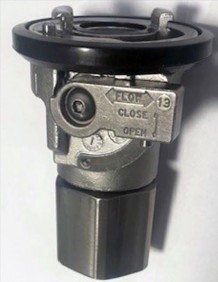
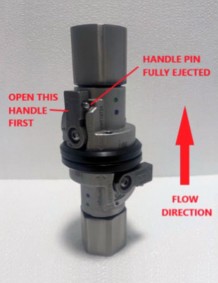
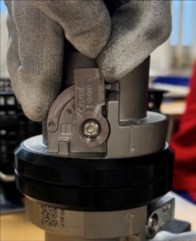
Compress the handle pin and twist it to open the 1st valve. The pin on the handle will fully eject when the valve is completely open. If there is pressure in the system, the cou- pling that the ow will reach last should be opened rst.
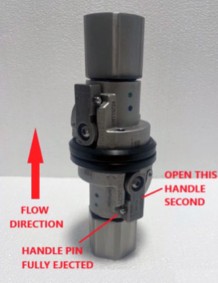
Compress the handle pin and twist it to open the 2nd valve. The pin on the handle will fully eject when the valve is completely open. If there is pressure in the system, the coupling that the ow will reach rst should be opened last.
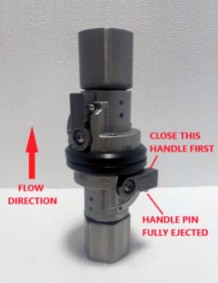

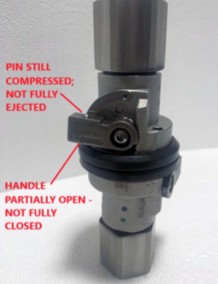
Close the handle that is on the same side as the ow direction rst. Press the handle pin and twist the handle until the pin is fully ejected. If the pin is not fully ejected, the valve is still partially open and can leak if the couplings are disconnected.
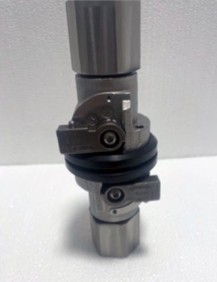
Close the handle that is farthest from the ow direction last. Press the handle pin and twist the handle until the pin is fully ejected. If the pin is not fully ejected, the valve is still partially open and can leak if the couplings are disconnected.
Untwist the couplings until the lugs are free to disengage.
Pull the couplings apart. Note:
If connection torque is too high (friction between bodies), faces can be lubricated as below. Use FUCHS HP LUBE 09 or equivalent (DO NOT USE mineral use based lubricants, or other product not compatible with EPDM material).
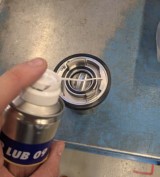

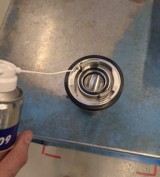
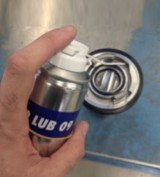
Area 1 Area 2 Area 3 Area 4
After some time without use, grease used for lubrication can dry up and make
rst handle rotation di cult (ball valve is sticking on sealing). In that case:
Manually push handle without activating pin, to apply extra force. Handle will rotate of ~1°, and friction of ball valve will be reduced.
Handle can then be rotated per standard instructions.
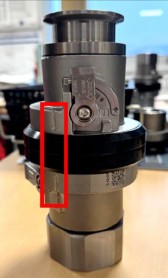
Connect the couplings into mechanical stop. The two arrows must be fully aligned (applicable to FD83 2” only).
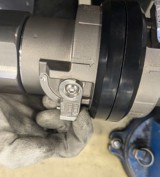
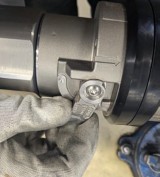
Step 1: when the parts are connected, rotate handle to open the circuit by actioning the handle pin
Step 2: then push the handle and try to close it without actioning the handle pin. The handle must be locked in open position.
Step 3: Close the circuit and try to open it without actioning the handle pin. The handle must be locked in close position.
Step 1 Step 2 Step 3
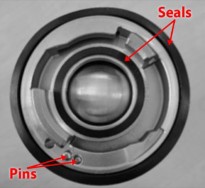
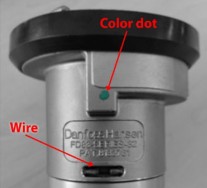
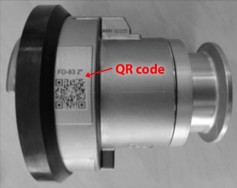
Check the presence of all components: pins, seals, wire, QR code and color dot.

About
Danfoss Power Solutions is a global manufacturer and supplier of high-quality hydraulic and electric components. We specialize in providing state-of-the-art technology and solutions that excel in the harsh operating conditions of the mobile off-highway market as well as the marine sector. Building on our extensive applications expertise, we work closely with you to ensure exceptional performance for a broad range of applications. We help you and other customers around the world speed up system development, reduce costs and bring vehicles and vessels to market faster.
We offer you expert worldwide support for ensuring the best possible solutions for outstanding performance. And with an extensive network of Global Service Partners, we also provide you with comprehensive global service for all of our components.
Danfoss Power Solutions – your strongest partner in mobile hydraulics and mobile electrification.
Products we offer:
Aeroquip by Danfoss
Boston by Danfoss
Danfoss Hansen
Danfoss Waltech
DCV directional control valves
Electric converters
Electric machines
Electric motors
Hydrostatic motors
Hydrostatic pumps
Orbital motors
PLUS+1® controllers
PLUS+1® displays and sensors
PLUS+1® joysticks and pedals
PLUS+1® operator interfaces
PLUS+1® software services,
support and training
PLUS+1® software
Position controls and sensors
PVG proportional valves
SEL by Danfoss
Steering components and
systems
Synflex by Danfoss
Telematics
Weatherhead by Danfoss
Winner by Danfoss

Danfoss can accept no responsibility for possible errors in catalogs, brochures, and other printed material. Danfoss reserves the right to alter its products without notice. This also applies to products already on order provided that such alterations can be made without subsequential changes being necessary in speci cations already agreed. All trademarks in this material are property of the respective companies. Danfoss and the Danfoss logotype are trademarks of Danfoss A/S. All rights reserved.
